FLY-AWAY KITS ARE MANDATORY FOR ALL CROSS-COUNTRY AND OVERWATER FLYING

All contents of the fly away kit are stored and should always be kept in a school provided, water-proof “dry-bag”. It is imperative that all safety equipment within each fly-away kit is inventoried, tested, and is fully mission capable before departure.

Afloat in the Molokai Channel or anywhere else in the Pacific Ocean is not the time to check the functionality of equipment or for learning how to employ the PLB and/or other items.


MINIMUM CONTENTS

*All contents are US Coast Guard Approved

  1. Personal Locator Beacon (PLB)

2. *Life Vest for each passenger on-board

3. L.E.D. Rescue Flare (Modern style replaces traditional pyrotechnic flare)

4. Fluorescent Dye-Pack (water activated; creates a fluorescent green, high-contrast surface for increased visibility)

5. Hand-held Signal Mirror


*You’ve heard it a million times; don’t pull down on life vest chord (to inflate) until you’re well clear of the aircraft

Additional personal equipment is recommended, i.e. Waterproof Flashlight, VHF Radio, Waterproof Cell Cas


NORMAL AND ABNORMAL OPERATIONS

Normal (Fly-Away Kit)

Use the fly-away kits “in-order” (#1 thru #5). No exceptions. For clarity, just use the lowest number available.

Kits labeled #1 thru #3 (yellow dry bags) are for two-person crews

Kits labeled #4 and #5 (orange dry bags) are for four-person crews A

Abnormal (Fly-Away Kit)

When a fly-away kit is “incomplete” and located in the locker labeled “Incomplete”, the next consecutive numbered kit should be used regardless of number of crew, i.e. two-person crew (yellow bag) takes a four-person crew bag (orange bag). The “incomplete” fly-away kit is to be used at PIC’s discretion, provided the “raft” and “PLB” (minimum) are serviceable. No flight over water are permitted without this minimum.


GOOD TO KNOW INFORMATION

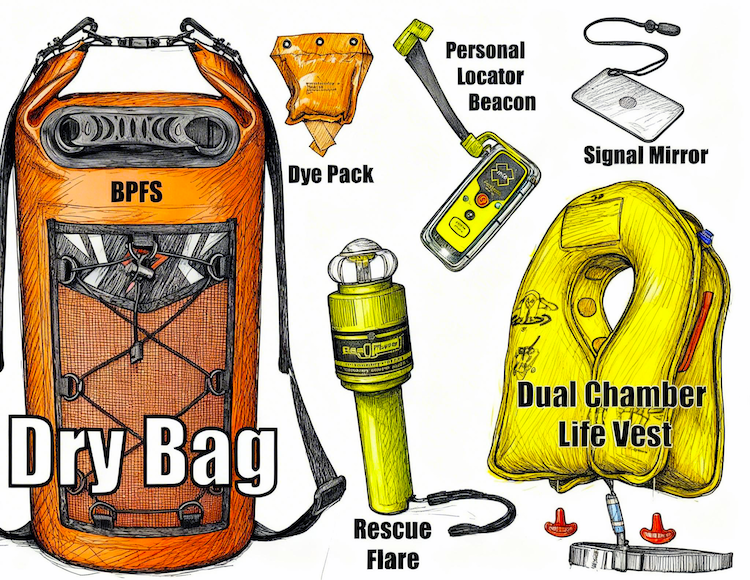
Not meant to be instructions for use. The Pilot-In-Command is responsible for, and to be familiar with the correct, safe usage and deployment of provided rescue equipment. Click the link below to see specific Owners Manual for instructions.

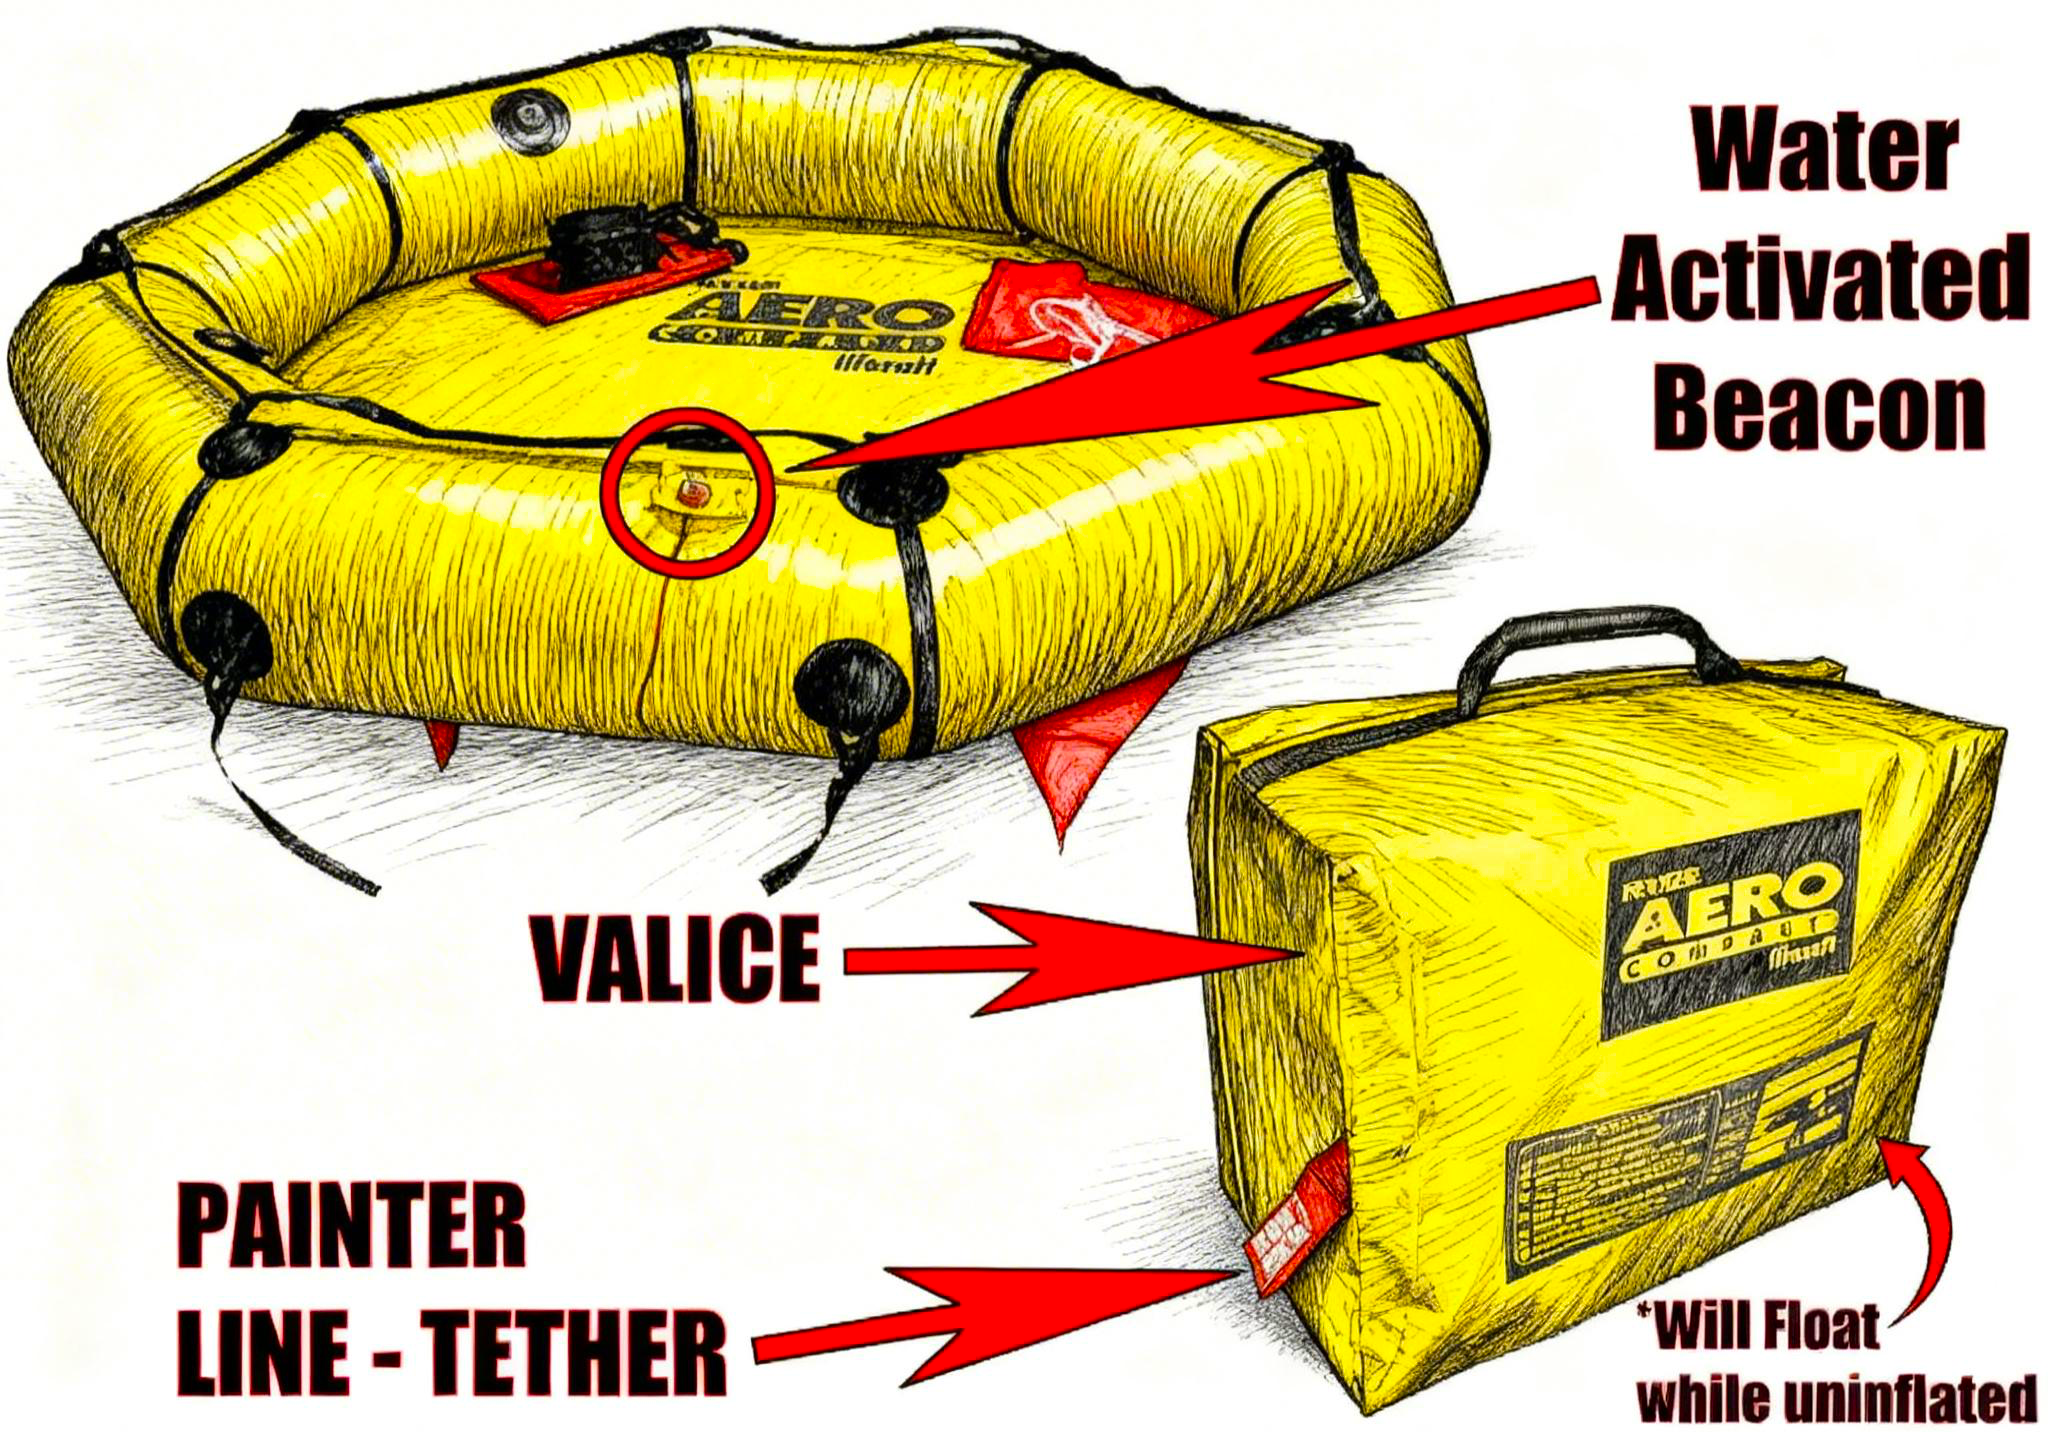
Deploying: After pulling red handle, fully extend the tether line approximately 6’ feet until taught, then give a sharp, fast pull using approximately 20 pounds of pressure to engage the Co2 cartridge and inflate. After inflating, the total lanyard length will be approximately 20’ feet.

To avoid having to “right” the raft (flip upside down), try to deploy the raft with handle facing upward. If it is necessary to “right” the raft, flip the raft over about the cylinder using the handles and lifeline provided.

Grip the red handle tight when deploying the raft in strong winds. Avoid the raft blowing away out of your hand.

Ballast bags sewn to the bottom of the rafts helps to prevent capsizing during uneven loading/boarding.

Rafts has a water activated strobe.

-The valice is a thick, robust cover for the raft and should be handled very carefully when transporting and storing to avoid puncturing the raft.

Instructions for usage of rescue rafts are not as intuitive as you may think. BPFS encourages all crews to view the link below to Aero and Revere Owners Manuals

*Valice: A small piece of luggage or carrying bag


Instructions for Deployment of PLB